Wednesday, February 28, 2007

Had to straighten out my k/b extender cable...

Was giving me fits. I made it in poor lighting and didn't realize not all of the strands of two wires were not tinned right and it gave me no end of 'wrong key' syndrome. Got it fixed tonight...


Here's a pic of a two-liner running on my repacked CoCo3 , with Roy's VGA adapter driving a 15" HP LCD. For a full review, see CaptCPU's review...

Later...

Tuesday, February 27, 2007

Okay Gang, it's time, it's time for some more Repack Pix!!!


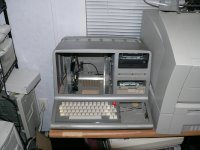
In the pic above, You can see Roy Justice's VGA adapterattached to the side of the drive tower, the ATX PS in the middle, the Model IV keyboard under the CoCoIII keyboard and the half-assed keyboard extenedr cable I made from an old floppy cable, a cut up ISA slot connector on one end (you'll see the other end in a bit).


Here's the current mounting for the CoCoIII motherboard. The two 'hooks' at the bottom are TRS-80 Model III clips dipped in Plasticoate. Currently, there is only one screw holding the ass'y up. There will be others when things become more permanent. In this view you can see the other end of the keyboard cable. this end is soldered to a 8-bit sound card card edge that I removed from an ancient SoundBlaster (R.I.P.) :)


Here's a pic of the screen generated by Mr. Justice's converter.


And a little better... Roy, if you have any idea how to center the picture, (as Ross Perot said) I'm all ears...

Saturday, February 17, 2007

Another (small) milestone reached...

I de-soldered the 68B09EP CPU from the repack mobo, installed the socket, then the 63C09EP!!! YAY ME!!!!

Seriously, I thought I torched the mobo in the process. I was trying out my Chinese rip-off version of the Hakko 852 rework station.


I actually tested it by removing caps, resistor IC's from an older PII mobo and an old ISA sound card. works really well. I just didn't take into account a 21 year old circuit board. Just below and to the right of the CPU, the board warped a little bit. I'd call it more of a bubble, however, the raised part is not flexible.

The 6809 came out relatively unscathed, just one mildly bent pin. Cleaning up the CPU solder pads proved to be the most difficult, and where I warped the board. I first tried to use the hot air to blow the solder from the holes (yeah, realized how stupid of an idea that was...). Then I tried to use some solder wick, which was pretty useless for this endeavor. What should have been the obvious solution, the dreaded solder sucker, came next. Hey, it worked, 'nuff said. Then it was back to the Hakko rip-off to solder the socket in. I can only say I love how fast this thing heats up, and how easy it is to solder small items with it.

Here are some pics:

Off to the left you can see just a wee bit of the ATX power supply.


Not not completely obvious to the untrained eye, thar she blows!!! That is a socketed 63C09EP working very little at this point...


Here's a pic of the ATX and the former resident of the CoCo3 mobo:


And here's a quick screen shot of it 'running.' I was too tired to dig out the MPI and hard drive stuf to really give it a go. I have 9 6309's left, so I'm sure I'll do this transplant again...


powered by performancing firefox

Monday, February 12, 2007

Small project to kill some time

While waiting for a few items for the re-pack, I was watching the auction on eBay for the Wico Atari joystick adapter. I remember that the other Bob has the schematic for one on his website. Since I do not have the etch tank or other equipment for etching my own boards, I took a different approach; stripboard. Here's a pic of my layout:


Quick parts list:

74HC4066 - $0.31 ea Jameco #74HC4066
10Kohm resistor - $0.69 Jameco #108126
47kohm resister - $06.9 Jameco #108206
Stripboard - Large $1.95 http://www.futurlec.com/ProtoBoards.shtml
6 pin circular DIN plug, inline, $1.26 Digikey - CP-1060-ND
Wire suitable for use as jumpers

I've included most items except the DB-9 connectors. A 14 pin IC socket for each 4066 would be advisable but not necessary. This construction would make two complete adapters.

Sunday, February 11, 2007

Roy's VGA adapter

Zowie!!! This thing looks great!! Can't wait to see what it'll do. For those not in the know, Roy made me a custom VGA adapter for the Model III repack. No case, no PS and a couple leads for running +5vdc (thanks for the correction, Roy!!!) from the ATX power supply. Working out how to mount it inside the case. Thinking PC type plastic motherboard spacers with hot melt glue... Now, if CaptCPU can send me the Model III keyboard article he promised in October... :) Once I get it mounted, I'll post some pics...


Later (B)

Tuesday, October 10, 2006

No, I'm not dead...

... but I haven't done much with the repack lately either. Money and time are a minor issue right now. The biggest issue is the fact that since early September I've been battling varied illnesses of one type or the other and just haven't felt like doing much.

I'll get back started on it as soon as I get to feeling better...

Later (B)

Wednesday, September 13, 2006

Update with some Pics


Here's a pic of the CoCo3 mobo. This mod was far less nerve-racking than the MPI was. One jumper, remove a transistor and attach the proper voltages where they need to go. Bingo!!!!


This one I fretted over for a fews days prior to doing, as it is my ONLY MPI. It worked out well that Cloud9 had already completed the PAL upgrade before I even got the thing. Knowing how sensitive these are, I put it off as long as I could. Removing the IC (9) I think, was the hardest part. The instructions I followed didn't say anything about removing Q1, but, after looking at the schematics I did it anyway since with the base and emitter disconnected from the circuit it was pretty useless...

(I'll post more later on since I do not have the docs in front of me right now...)

Monday, September 04, 2006

9/4/06 - Another quick update:

Sorry for the lack of pics and updates lately. Been fighting an abscesed tooth and a stomach virus. The good news is, I was also able to get my MPI to run from DC from the ATX power supply without frying it (yea me!!!).

On a side note, it looks as if I'm getting a Model IV, in a Model III silver case, that has power supply problems. The original owner says the monitor PS is bad. I didn't know until I go to doing a little research, but, the monitor in those is a 12vdc monitor. I've never owned a Model III/IV before and am looking forward to trying to get it to run from an ATX power supply also and actually working with one. I figure a 200-250w Mini-ATX should do the trick.

I've got to prioritize here, so the CoCoIII repack comes first, then I'll get to work on the Model IV.

As soon as I remember to bring the digital camera home from work, I'll get som pics of the mods to the CoCoIII mobo and MPI to show the mods I made to get them to run from the ATX, as well as a pic of it playing Tetris... Now, I've got to order Roy's VGA adapter to get everthing running...

Sunday, August 20, 2006

8/20/06 - Quick update

Got my cc3 repack board running from an ATX power supply today. Pics to come later...

Saturday, August 12, 2006

Some close-ups...

Well, I changed my mind on the location of the LCD electronics. I just mounted them back on the LCD where they were, made some minor adjustments and it all looks a little cleaner.


The next two shots are a little misleading as the LCD is almost perfectly level.


My own eBay Auction

This blows me away. I comment to CaptCPU several times on how high Coco2's have been selling. Now, my own auction for the original Model III floppy drives

Model III Floppies

went for $43.00 ea. A little shocked...

Thursday, August 10, 2006

Repack Pics

This pic is part of the aluminum frame that the boards will mount to. It will most likely be coated in liquid urethane when done. The Mobo will be mounted on it's side, not necessarily as shown, to allow plenty of room for the Cloud9 add-ons.


The 15" LCD power supply and controller wil be mounted to the inside left of the case. The power supply, being AC, will piggyback off of the PC power supply AC socket.

This is by no means even close to what I want. Just was looking for an idea of what she would look like.


Again, just getting a feel for her looks...

Here's how I modified the back of the LCD. Since my hot xacto knife is dead, I used a regular xacto, a MAP gas torch, sandpaper and a good bit of elbow grease. Now I just gotta decide whether to leave it black or paint it white when I paint the rest of the case...


Well, here's me... I have never posted a pic of myself on the internet before for fear of being the star attraction of a 'priceless' chain mail.

BTW, Capt. Cris, sorry I stole your colors, but, the grey really was ugly.

And if anyone protests me having links to thier sites, I will take them down...


First post!!!


Well, this is it!! Cris over at The Coco Collector talked me into it, so here I am. This is officially my unofficial site I will use to track the progress of my Coco 3 re-pack project. I'm terribly new at blogging so forgive me if I suck at it.

Here is a pic of the Model III shortly after discecting it. Next to the case you can see the part of the CRT that actually broke off. In the Navy, we referred to it as the electron gun. Don't know what they call it now....


Here's all the innard from it. Yep, all circuit boards. Sold on eBay to a guy in Austria. The keyboard went to Belgium and I'm still waiting to find out where the floppy drives will go.

When I get home later, I'll post some progress picks of the rack I'm making to mount the cc3 mobo, the MPI and all of the LCD parts...